
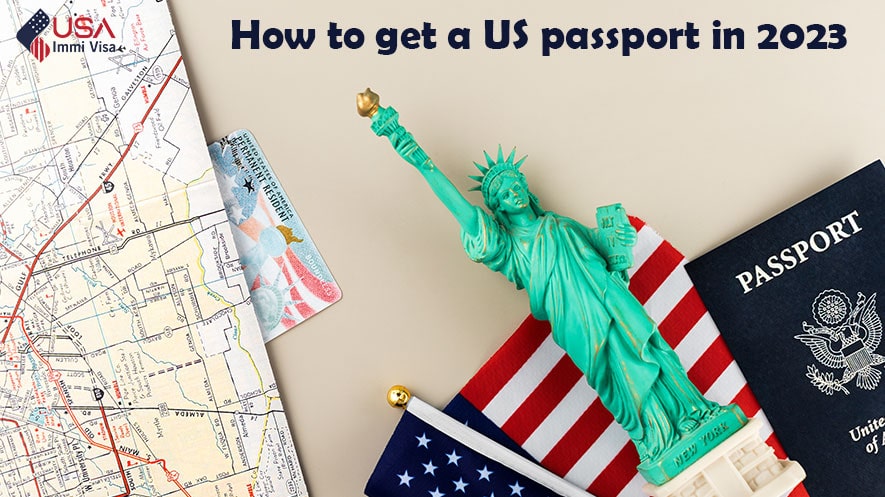
Get a US Passport
Obtaining a US passport is a pivotal step towards expanding your horizons and embracing international opportunities. Navigating the process to acquire this essential travel document requires an understanding of the intricate steps involved. This guide unveils a comprehensive roadmap on “How to Get a US Passport,” providing you with clear directions and insights to ensure a seamless journey toward holding this coveted proof of identity and citizenship. From documentation requirements to application procedures, empower yourself with the knowledge to embark on this important endeavor confidently.
Step 1: Gather Required Documents
Get a US passport is an essential step for international travel and identification. To begin this process, you must gather the necessary documents to ensure a smooth application. Follow these guideline.
- Proof of Citizenship: The first vital document you need is proof of your US citizenship. This can be a certified birth certificate, a previously issued US passport, a consular report of birth abroad, or a certificate of naturalization/citizenship.
- Proof of Identity: Along with citizenship proof, you must provide a valid form of photo identification. This can be your driver’s license, state-issued ID, military ID, or government employee ID.
- Passport Application Form: Fill out the appropriate passport application form. Form DS-11 is typically used for first-time applicants and minors. You can complete this form online or print it and fill it out by hand.
- Passport Photo: Obtain a recent passport photo that meets the US Department of State’s photo requirements. These photos are typically 2×2 inches in size and must have a plain white or off-white background.
- Payment: Prepare the required fees for your passport application. These fees cover processing and any optional services you may choose. Payment methods can include credit/debit cards, checks, or money orders.
- Parental Consent (For Minors): If the applicant is a minor under 16 years old, both parents or legal guardians must provide consent. This usually involves their presence during the application process or providing notarized written consent.
- Special Circumstances Documentation: If there are any special circumstances, such as name changes due to marriage or divorce, legal documentation to support these changes must be provided.
- Expedited Services (Optional): If you need your passport urgently, you can request expedited services for an additional fee. This will ensure a faster processing time
Step 2: Complete the Application Form
Completing the application form to Get a US passport is a crucial step towards obtaining this essential travel document. Follow these instructions to ensure a smooth and successful application process:
- Access the Official Website: Visit the official website of the U.S. Department of State dedicated to passport services. You can find the application form (DS-11) available for download or online completion.
- Gather Required Documents: Before filling out the application form, gather all necessary documents. These typically include proof of citizenship, such as a birth certificate or naturalization certificate, and a valid form of photo identification, like a driver’s license. Make sure to have copies and originals ready.
- Accurate Information: Begin filling out the application form with accurate details. Double-check all entries to avoid errors that could delay the processing of your passport.
- Social Security Number: Provide your social security number, as it’s a mandatory requirement for passport applications. If you don’t have one, there are alternative procedures explained on the official website.
- Passport Photo: Affix a recent passport photo to the application form. Follow the guidelines provided on the website for photo specifications to ensure it meets the necessary criteria.
- Parental Consent: If the applicant is a minor under the age of 16, both parents or legal guardians must provide consent. In case one parent cannot be present, a notarized consent form is necessary.
- Payment: Pay the required fee for your passport application. The fee varies depending on factors such as your age and whether you’re getting a new passport, a renewal, or a child’s passport.
- Submission: Once the form is complete, you can submit it in person at a passport acceptance facility or by mail. If submitting by mail, make sure to use a secure and trackable method.
- Processing Time: Keep in mind that processing times can vary, especially during peak travel seasons. Check the official website for estimated processing times and any expedited options that may be available.
- Follow Up: After submission, you can track the status of your passport application using the provided tracking number. Make sure to follow up and address any issues promptly.
Step 3: Choose Application Type
In the process of obtaining a US passport, Step 3 involves choosing the appropriate application type. This crucial step ensures that you’re applying under the correct category, streamlining the passport acquisition process.
To determine the right application type, it’s essential to consider your specific circumstances. The various categories include:
- New Passport: If you’ve never had a US passport before, this is the category for you. This applies to first-time applicants, including minors and adults.
- Passport Renewal: If your current passport has expired or is about to expire, you can renew it within a certain timeframe. Renewing your passport is generally simpler than applying for a new one.
- Child Passport: When applying for a passport for a minor (under 16 years old), additional documentation and parental consent are usually required.
- Lost or Stolen Passport: If your passport has been lost or stolen, you’ll need to follow specific steps to replace it. This may involve additional paperwork and an explanation of the circumstances surrounding the loss.
- Name Change: If your name has legally changed due to marriage, divorce, or other reasons, you’ll need to apply for a passport under your new name.
- Limited Validity Passport: In certain situations where immediate travel is necessary, you can apply for a limited validity passport. This type of passport is issued for a short period and specific purpose.
Step 4: Pay the Applicable Fees
Once you’ve completed the necessary paperwork and gathered all required documents, the next crucial step to Get a US passport is paying the applicable fees. These fees cover the processing, issuance, and delivery of your passport. Here’s a breakdown of the process:
- Calculate the Fees: Before making any payments, it’s essential to calculate the exact fees you need to pay. The fees vary depending on factors such as your age, the type of passport you’re applying for, and whether it’s a new application or a renewal. You can find a fee calculator on the official website of the U.S. Department of State.
- Payment Options: The Department of State provides multiple payment options to make the process convenient for applicants. You can typically pay by credit or debit card, check, money order, or even in cash at certain authorized locations. Some post offices and acceptance facilities offer on-site payment services.
- Online Payment: If you’re applying for a new passport or renewing an adult passport, you can often pay the fees online through the official U.S. Department of State website. This method is secure and allows you to track your payment status.
- Payment Confirmation: After making the payment, you’ll receive a confirmation of your transaction. This confirmation is important, so keep it safe. It contains information about the amount paid, the payment method, and other relevant details.
- Additional Fees: In some cases, there might be additional services you wish to add to your application, such as expedited processing or overnight delivery. These services come with their own separate fees, so make sure to account for them if needed.
- Keep Records: It’s crucial to maintain accurate records of your payment and confirmation. You might need this information for tracking your application status or in case any issues arise.
- Processing Time: The processing of your passport application will begin once the fees are successfully paid. The time it takes to process your passport can vary based on factors such as the time of year and current demand. Expedited processing is available for an additional fee if you need your passport sooner.
Step 5: Passport Photo
In the process to Get a US passport, Step 5 involves obtaining the crucial passport photo. This seemingly simple step holds immense significance as it encapsulates your identity for international travel and official documentation. Here’s a concise guide on how to secure the perfect passport photo.
Why Passport Photos Matter: Passport photos are more than just snapshots; they are a tangible representation of your identity that will be recognized worldwide. These photos are used not only on your passport but also for visas, driver’s licenses, and other forms of identification. Ensuring accuracy and compliance with specific requirements is paramount to prevent potential delays in your passport application process.
Guidelines for an Ideal Passport Photo:
- Professional Setup: Seek out a professional photo studio with experience in passport photos. Their familiarity with the specific requirements will greatly enhance your photo’s compliance.
- Proper Attire: Wear clothing that you would typically wear on a daily basis. Avoid uniforms, costumes, and overly casual attire.
- Neutral Expression: Maintain a neutral facial expression, with both eyes open and mouth closed. Glasses can be worn, but ensure there is no glare or reflection on the lenses.
- Background and Lighting: The background should be plain white or off-white. Adequate lighting is crucial to avoid shadows or glares on your face.
- Size and Framing: The photo should be 2×2 inches (5×5 cm) in size. Your face should take up around 50-70% of the photo area, from chin to the top of your head.
- Resolution and Quality: Ensure the photo is high-resolution with sharp focus. No digital alterations or retouching should be done.
- Natural Appearance: Minimal makeup and simple hairstyles are recommended. Do not use filters or excessive editing that alters your natural features.
DIY vs. Professional Photography: While some may consider taking passport photos at home, it’s safer to opt for professional photography. Professionals are well-versed in the exact specifications required by the US Department of State. This significantly reduces the chances of your photo being rejected due to non-compliance.
Submission and Verification: After receiving your passport photo, ensure it aligns with the official guidelines. You can use online tools or guidelines provided by the US Department of State for verification. Submit the photo electronically along with your passport application, whether it’s a new application, renewal, or a child’s passport.
Step 6: Locate a Passport Acceptance Facility
Once you’ve completed the necessary paperwork and gathered all the required documents for your US passport application, the next crucial step is to locate a Passport Acceptance Facility near you. These facilities play a pivotal role in verifying your identity and assisting with the submission of your application.
Here’s how to proceed:
- Use the Official Tool: The U.S. Department of State provides an online tool on their official website that allows you to find the nearest Passport Acceptance Facility. Simply input your location details, and the tool will provide you with a list of nearby locations along with their contact information.
- Check Facility Types: Passport Acceptance Facilities come in various types, including post offices, libraries, clerk of court offices, and other government buildings. Depending on your preference and availability, you can choose a facility that suits your schedule and location.
- Schedule an Appointment: While some facilities accept walk-ins, it’s highly recommended to schedule an appointment beforehand. This ensures that a designated staff member will be available to assist you, reducing your wait time and ensuring a smooth process.
- Review Operating Hours: Different facilities may have varying operating hours and days of the week when they accept passport applications. Make sure to check their timings and choose a slot that aligns with your schedule.
- Arrive Prepared: When you visit the Passport Acceptance Facility, make sure you have all the required documents, including your completed application form, proof of citizenship, identification documents, and passport photos. Bringing photocopies as well as the originals is advisable.
- Verification and Submission: Upon arrival, a trained acceptance agent will review your documents, verify your identity, and ensure that everything is in order. They will then assist you in submitting your application to the proper authorities.
- Payment and Fees: Be prepared to pay the applicable fees for your passport application. These fees can vary depending on factors such as your age and the type of passport you’re applying for. Most facilities accept credit/debit cards, checks, and money orders.
- Receipt and Tracking: After successfully submitting your application, you’ll receive a receipt that contains your application’s tracking number. This number allows you to track the progress of your application online.
Step 7: Oath of Allegiance
During the appointment, you will take an oath of allegiance, confirming the truthfulness of the information you provided. For minors, both parents or guardians must consent to the child’s passport application.
Step 8: Track Application Status
After submitting your application, you can track its status online through the U.S. Department of State’s Passport Application Status website. This helps you stay informed about its progress.
Step 9: Receive Your Passport
Once your application is approved, you will receive your US passport by mail. Standard processing times vary, but expedited services are available for an additional fee if you require your passport sooner.
Conclusion:
Get a US passport is an essential and exciting step towards exploring the world. By following these steps and fulfilling the necessary requirements, you’ll be well on your way to holding your very own US passport and embarking on international journeys with ease. Remember to plan ahead and ensure you have ample time before your intended travel dates to avoid any last-minute stress.